Getting a professional roof inspection after a hailstorm is the only way to know if your roof sustained damage, because not all hail events cause visible problems right away. The severity depends on factors like hail size, wind speed, and your roof's age and condition. Even small dents or cracks can compromise your roof's ability to protect your home.
According to the National Weather Service (NWS), hail that is 1 inch in diameter or larger (about the size of a U.S. quarter) meets the threshold for a severe thunderstorm, which is a practical signal to prioritize a prompt roof inspection after a hailstorm even if damage is not obvious from the ground.
Hailstorms can strike without warning and leave behind damage that isn't always easy to spot from the ground. Your roof might look fine at first glance, but hail can cause hidden problems that lead to leaks, structural issues, and costly repairs down the road.
This guide will walk you through why inspections matter, what damage looks like, how professionals assess your roof, and what steps to take next.
Let's break down to the key points you should consider:
- Why a roof inspection is critical after a hailstorm
- Signs of hail damage to look for
- The professional roof inspection process
- Repair options after a hailstorm
- Maintenance and prevention tips
You'll also learn how to work with your insurance company and prevent future damage to keep your home safe.
Why a roof inspection is critical after a hailstorm
Hail damage can weaken your roof immediately or cause problems that develop over time, making a thorough inspection essential for protecting your home and avoiding expensive repairs down the road.
Identifying visible and hidden hail damage
Hail strikes create damage that ranges from obvious dents to subtle cracks you can't see from the ground. Large hailstones leave clear marks like broken shingles, cracked tiles, or dented metal flashing. Smaller hail causes damage that's harder to spot but still serious.
Common types of hail damage include:
- Bruising on asphalt shingles where granules are knocked loose
- Cracks in the mat beneath the shingle surface
- Dents in metal vents, gutters, and drip edges
- Damaged or split wood shakes
- Fractured sealant around roof penetrations
The granules on your shingles protect against UV rays and weather. When hail knocks them off, your roof ages faster and becomes vulnerable to leaks. You might not notice this damage right away, but it shortens your roof's lifespan significantly.
A professional inspector knows where damage hides. They check areas you can't easily access and use techniques to spot problems that won't show up in a quick visual scan.
Preventing leaks and water intrusion
Even small breaks in your roof's protective barrier let water seep through. Hail cracks the shingle surface or punctures the underlayment, creating entry points for moisture. These openings might not leak immediately, but rain will eventually find its way inside.
Water intrusion starts small and grows worse with each storm. A tiny crack allows moisture to penetrate the decking beneath your shingles. Over weeks and months, this moisture spreads through the wood, causing rot and mold growth.
Your attic insulation absorbs this water, reducing its effectiveness and creating conditions for mold. Water stains on your ceiling mean damage has already progressed significantly. By the time you notice interior signs, repairs cost much more than they would have if caught early.
According to the CDC, when water gets into a home, you should clean and dry or remove wet items within 24–48 hours to help prevent mold growth—supporting fast leak mitigation and moisture control if a storm damage assessment finds active water intrusion.
An inspection after hail identifies these vulnerable spots before water causes serious damage. Quick repairs keep small problems from turning into major structural issues.
Protecting your home's structural integrity
Your roof supports more than just shingles. The entire system includes decking, trusses, and support beams that work together to protect your home. Hail damage compromises this system in ways that affect your whole house.
Water that enters through hail damage rots the wooden decking. Rotted decking can't hold fasteners properly, causing shingles to lift or blow off in future storms. The problem spreads to the rafters and trusses if left unchecked.
Damaged flashing around chimneys, skylights, and vents creates gaps where water flows into wall cavities. This moisture damages insulation, electrical systems, and drywall. In cold climates, trapped moisture freezes and expands, making cracks worse.
Commercial roofs face even greater risk because they have more components and potential failure points than residential roofs. A single compromised area can affect the entire roofing system, leading to widespread damage across large sections of the building.
Regular inspections catch these issues while repairs are still manageable and affordable.
Signs of hail damage to look for
Hail can leave distinct marks on your roof that signal the need for immediate attention. Black spots, dents, and missing pieces of your roofing materials are the main indicators that a hailstorm has compromised your roof's protection.
Damaged or missing shingles
During a hail damage roof inspection, you should look for shingles that have cracked, torn, or gone missing entirely. Hail impact can break the seal between shingles, causing them to lift or curl at the edges. You might notice entire pieces of shingles lying in your yard after a storm.
Check for splits in the shingle material that run in different directions. These cracks often appear random rather than in straight lines. The damage pattern helps you tell the difference between hail damage and normal wear.
Missing shingles create gaps in your roof's protection. Water can seep through these openings and damage the underlayment and wood beneath.
Dents, cracks, or granule loss on roofing materials
Look for soft, dark spots on your asphalt shingles that feel spongy when you press on them gently. These black marks show where hail struck hard enough to bruise the shingle material. The granules protect your shingles from sun damage, so their loss shortens your roof's life.
Check your gutters and downspouts for piles of granules that look like coarse sand. Heavy granule loss appears as bald spots on shingles where the black asphalt shows through.
Hailstones can create dimples or dents in the shingle surface without breaking through. These dents might be hard to spot from the ground but become obvious during a close inspection.
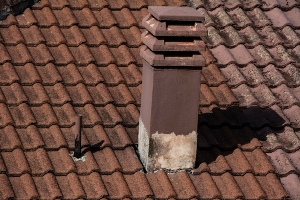
Gutters, vents, and flashing damage
Your metal roof components often show hail damage more clearly than shingles. Look for dents in your gutters and downspouts that appear as small round indentations. Check both the face and bottom of your gutters.
Examine roof vents, pipes, and metal flashing around chimneys for similar dent patterns. These metal surfaces act like indicators of hail size and intensity.
Damaged flashing can create gaps where water enters your home. Pay attention to the areas where your roof meets walls or around skylights. Even small dents in these components can lead to leaks over time.
The professional roof inspection process
A professional roofing inspection follows a structured approach that includes examining all roofing surfaces systematically, using industry-standard tools to detect hidden damage, and creating detailed documentation that supports your insurance claim.
Step-by-step assessment of roofing surfaces
Your roofing professional will start by walking around your property to observe the roof from ground level. This initial view helps identify obvious damage like missing shingles or visible dents before climbing up.
Once on the roof, the inspector examines each section carefully. They look for dents in shingles, cracked or bruised areas, and granule loss that exposes the underlying material. Metal components like flashing, vents, and chimneys receive close attention since hail often leaves clear dent patterns on these surfaces.
Per OSHA, roofing work performed 6 feet or more above a lower level generally requires fall protection (such as guardrails, safety nets, or personal fall arrest systems), which is one reason a professional roofing inspection is safer than attempting a close-up hail damage roof inspection yourself.
The inspector checks your gutters and downspouts for dents and paint damage. They also examine soffit, fascia, and edges where water damage often starts. Inside your home, they inspect the attic for signs of leaks, water stains, or moisture in the decking.
Each roofing material shows hail damage differently. Asphalt shingles may have dark spots where granules are knocked off. Wood shakes show splits or impact marks. Metal roofing displays obvious denting.
Use of specialized tools and techniques
Professional inspectors use specific tools that help identify damage you might miss with the naked eye. A chalk test involves rubbing chalk across suspected impact areas to highlight indentations. Core cutters remove small shingle samples to examine all layers for hidden damage.
Moisture meters detect water penetration in roof decking that isn't visible from the surface. Infrared cameras can locate trapped moisture and insulation problems caused by leaks. These tools provide evidence that supports your storm damage assessment.
Inspectors measure hail hits per square foot in specific test areas. Insurance companies often require this data to approve claims. A standard test square measures 10 feet by 10 feet, and insurers typically look for 8-10 hits minimum in that area.
Documenting damage for insurance purposes
Your inspector creates a detailed report with photographs of every damaged area. They mark locations on roof diagrams and note the type and severity of each issue. Time-stamped photos prove the damage exists and show its extent.
The documentation includes measurements of dents, counts of damaged shingles, and notes about the age and condition of your roofing materials. This record becomes critical for your insurance roof inspection since adjusters need clear evidence to process claims.
Most professionals provide a written estimate for repairs or replacement. They list all damaged components, required materials, and labor costs. This estimate helps you understand the scope of work and gives your insurance company the information needed to determine coverage.
Repair options after a hailstorm
Once damage is confirmed, you'll need to decide between targeted fixes and complete replacement, select materials that can withstand future storms, and coordinate with both contractors and your insurance company.
Spot repairs vs. full roof replacement
Minor hail damage affecting only a few shingles can often be fixed with spot repairs. This approach works when damage is limited to small areas and the rest of your roof is in good condition.
A full roof replacement becomes necessary when hail has impacted more than 30-40% of your roof surface. Widespread damage, multiple leaks, or an aging roof (over 15-20 years old) also point toward replacement. Your insurance adjuster will assess the extent of damage to determine coverage.
Spot repairs cost less upfront but may not match your existing shingles perfectly. Full replacement provides uniform protection and lets you upgrade to better materials. Consider your roof's age and the severity of damage when making this decision.
Choosing durable, hail-resistant materials
Impact-resistant shingles rated Class 4 (the highest rating) can withstand hailstones up to 2 inches in diameter. These shingles feature reinforced construction that absorbs impact better than standard options.
Metal roofing offers excellent hail resistance and can last 40-70 years. Steel and aluminum roofs may dent from large hail but rarely puncture or crack.
Synthetic slate and rubber roofing materials provide strong hail protection while weighing less than traditional slate. Some insurance companies offer discounts ranging from 10-35% for installing Class 4 rated materials. Ask your contractor about warranties that specifically cover hail damage.
Working with contractors and insurance adjusters
Schedule your insurance inspection within a few days of the storm, as most policies have claim deadlines. Take photos and videos of all damage before any repairs begin.
Get written estimates from at least three licensed roofing contractors. Verify they carry liability insurance and workers' compensation coverage. Check their references and online reviews before signing any contracts.
Your insurance adjuster may need to inspect the roof alongside your contractor to agree on the scope of damage. Never sign a certificate of completion until all work is finished and inspected. Some contractors offer to handle your insurance claim directly, but review all documents yourself before approval.
Maintenance and prevention tips
Regular upkeep and smart preparation protect your roof from future hail damage and extend its lifespan. Simple maintenance tasks like routine checks, storm-ready improvements, and gutter care reduce the risk of serious damage when the next storm hits.
Routine inspections to catch early damage
You should inspect your roof at least twice a year, ideally in spring and fall. These regular checks help you spot minor issues before they turn into expensive repairs.
Look for missing or damaged shingles, cracks in flashing, and worn sealant around vents and chimneys. Small problems like lifted shingle edges or tiny dents can worsen over time if left unaddressed.
After any hailstorm, schedule an inspection even if you don't see obvious damage. Hail can create bruises in shingles that don't show up right away but weaken your roof's protective layer.
Keep a record of each inspection with photos and notes. This documentation helps when filing insurance claims and tracking your roof's condition over time.
Preparing your roof for future storms
Install impact-resistant shingles rated Class 4 when replacing your roof. These shingles withstand hail better than standard materials and may qualify you for insurance discounts.
Secure loose shingles and replace damaged ones before storm season arrives. Check that all flashing is properly sealed and fastened to prevent wind uplift during severe weather.
Trim tree branches that hang over your roof by at least 10 feet. Falling limbs during storms cause significant damage and leave debris that traps moisture.
Cleaning debris and maintaining gutters
Clear your gutters at least twice yearly to prevent water backup that can damage your roof deck and fascia. Clogged gutters add weight and stress to your roof structure.
Remove leaves, twigs, and granules that wash off damaged shingles. These materials block water flow and create pools where leaks develop.
Check downspouts to make sure water drains at least 6 feet away from your foundation. Proper drainage protects both your roof and your home's structural integrity.
Conclusion
Getting your roof inspected after a hailstorm is one of the most important steps you can take to protect your home. Hail damage isn't always visible from the ground, and what looks fine today could turn into a major problem tomorrow.
A professional inspection gives you the facts you need. You'll know exactly what damage exists and whether repairs are necessary. This documentation is also critical for insurance claims.
Don't wait weeks or months to have your roof checked. The sooner you identify damage, the sooner you can file claims and start repairs. Many insurance policies have strict deadlines for reporting storm damage.
Your roof protects everything inside your home. Taking action after a hailstorm means you're being proactive about maintaining that protection. A professional inspector has the training and tools to spot issues you might miss, giving you peace of mind about your roof's condition.
Schedule a professional roofing inspection with Michaelis Corp right after a hailstorm so you can document storm damage for insurance and address compromised shingles, flashing, or leaks before moisture spreads.

.avif)