If mold has made your drywall soft or covers more than 10 square feet, you need to remove and replace the affected sections completely.
Mold on your drywall is more than just an eyesore. It can damage your home's structure and create health problems for you and your family. When moisture gets trapped in drywall, mold grows quickly and spreads to other areas.
Small patches of surface mold might be cleanable, but deeper problems require professional repair. Acting fast helps you avoid bigger repairs later.
Wet, moldy drywall is often not a “clean-and-save” material; per the U.S. EPA, wet porous materials with mold growth may need to be discarded because mold can infiltrate porous substances and be difficult (or impossible) to fully remove.
This guide walks you through everything you need to know about fixing mold damaged drywall. You'll learn how to spot the warning signs, understand what causes mold growth, and decide when to call in experts.
Through the topics below, you’ll learn what to do next:
- Mold affected drywall repair for safe and effective restoration
- What mold affected drywall repair involves
- Common causes of mold on drywall
- Signs you need mold affected drywall repair
- The professional mold affected drywall repair process
- DIY vs professional mold affected drywall repair
- Preventing mold on drywall in the future
- Why choose Michaelis Corporation for mold affected drywall repair
You'll also discover practical steps to keep mold from coming back after repairs are done.
Mold affected drywall repair for safe and effective restoration
Mold affected drywall repair requires quick action to protect your home and health. When you spot mold on your walls, you need to determine how bad the problem is before starting repairs.
Small mold problems (less than 10 square feet) can sometimes be cleaned with the right products. You can treat surface mold if the drywall is still firm and dry. However, if the material feels soft or spongy, you must remove and replace it completely.
Large mold problems (more than 10 square feet) need professional help. Drywall mold remediation experts have the tools and training to handle serious cases safely.
When to remove and replace drywall
Condition
Action Required
Soft or spongy texture
Remove and replace
Mold covers more than 10 sq ft
Professional remediation
Surface mold only, firm drywall
May be cleanable
Discoloration with moisture
Likely needs replacement
Your repair process should include these key steps:
- Stop the water source causing mold growth
- Cut out damaged drywall sections completely
- Install mold-resistant drywall sheets as replacement
- Use mold-resistant joint compound for finishing
- Ensure proper sealing to prevent future moisture
You cannot skip the moisture control step. Even perfect repairs will fail if water keeps getting into your walls. Check for leaks, improve ventilation, and fix any drainage issues around the affected area.
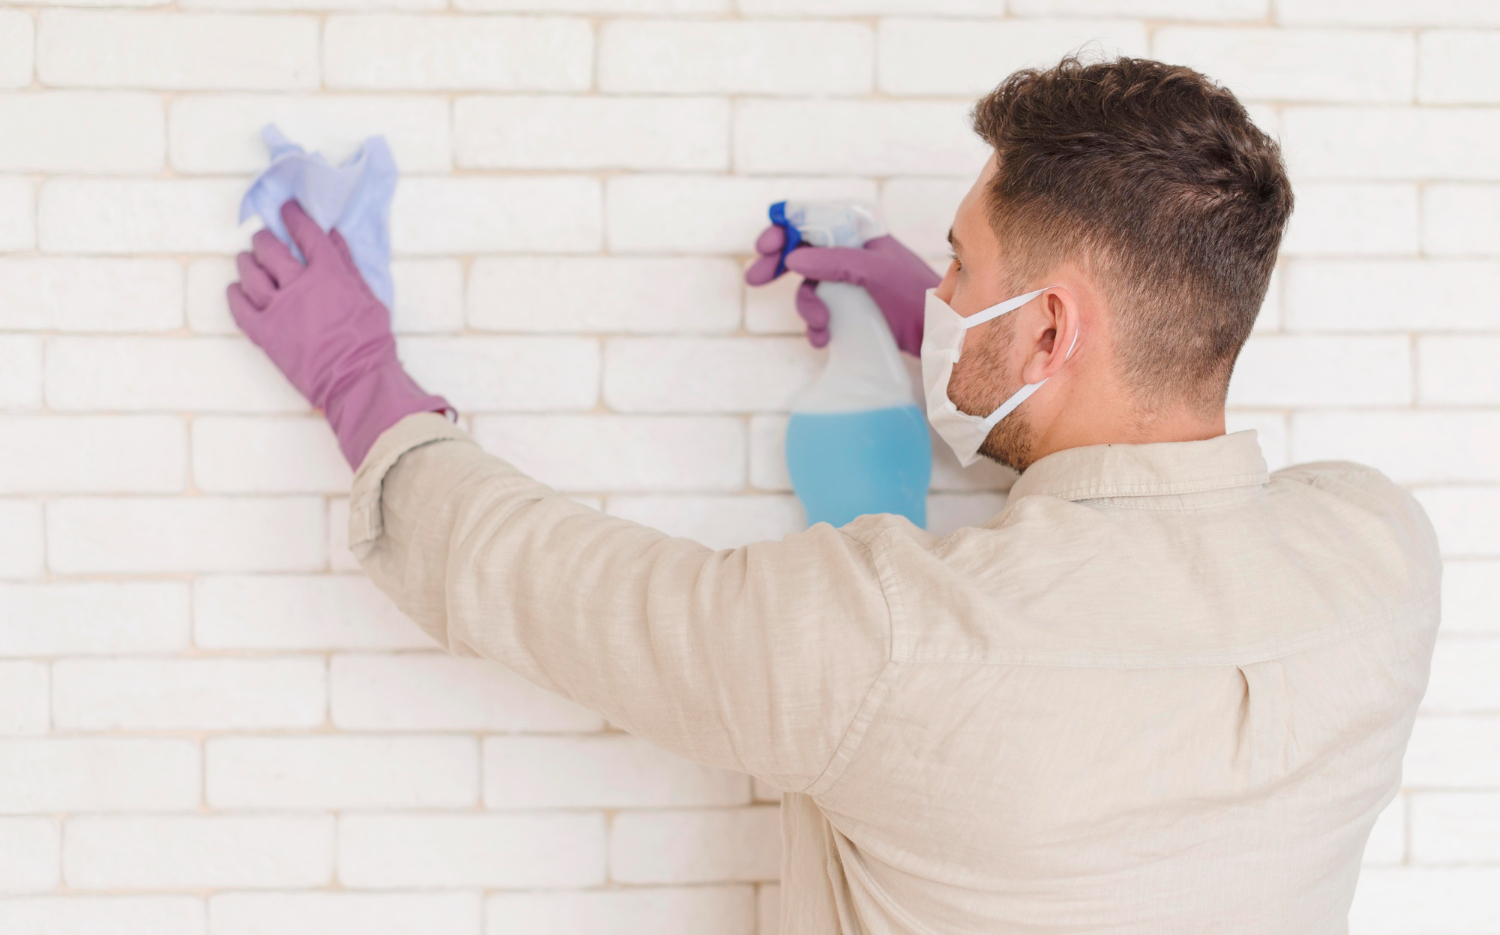
Always wear protective equipment during repairs. This includes gloves, masks, and eye protection to avoid breathing mold spores.
What mold affected drywall repair involves
Mold damage repair requires a systematic approach that starts with evaluation and ends with prevention measures. The process includes careful inspection, proper containment, complete removal of damaged materials, and treatment of surrounding surfaces to stop future growth.
Identifying and assessing mold damage
You need to determine how far the mold has spread before starting any repair work. Look for visible signs like black, green, or white patches on your drywall surface. Check for musty odors, water stains, and discoloration.
Use a moisture meter to measure dampness levels in the wall. Areas with readings above 16% typically harbor mold growth. Tap the drywall surface to test its firmness.
Soft or spongy drywall means the mold has penetrated deep into the material. You must replace any section larger than 10 square feet or any area where the structural integrity has been compromised. Smaller patches with surface mold may only need cleaning and treatment.
Document the affected areas by taking photos and noting measurements. This helps you plan materials and ensures you address all problem spots during repair.
Containing the affected area to prevent spread
Seal off the work area before you start removing moldy drywall. Cover doorways and vents with plastic sheeting and tape to prevent mold spores from traveling to other rooms.
Set up negative air pressure using fans that exhaust outside. This pulls air out of the work area instead of pushing contaminated air into clean spaces. Turn off your HVAC system to avoid spreading spores through air ducts.
Wear personal protective equipment including an N95 respirator mask, gloves, and safety goggles. Cover your clothing or wear disposable coveralls.
Place plastic sheeting on floors to catch debris. Keep a spray bottle with water nearby to mist surfaces before cutting or removing material, which reduces airborne spores.
Removing and replacing mold-infested drywall
Cut out damaged drywall sections at least 12 inches beyond visible mold growth. Make cuts along wall studs to provide support for new drywall. Remove all affected insulation behind the drywall as well.
If the wall cavity got wet, insulation typically must come out (even when the wallboard looks like it dried); according to HUD, wet fibrous insulation can stay wet long enough to support hidden mold growth and decay fungi inside walls, so it should be removed.
Place removed materials directly into heavy-duty plastic bags and seal them immediately. Clean the wall studs and framing with a wire brush to remove any remaining mold debris.
During drywall removal, dust control and sealed disposal reduce spore spread; per OSHA, re-wetting materials with a mist of water can help suppress spores and debris, and discarded moldy materials should be wrapped/sealed in plastic to reduce the spread of spores.
Apply a mold-killing solution to all exposed framing members. Let the treated areas dry completely before installing new materials. This typically takes 24 to 48 hours depending on humidity levels.
Install new drywall pieces cut to fit the openings. Use mold-resistant drywall in areas prone to moisture. Secure the panels with drywall screws spaced 8 inches apart along studs.
Apply mold-resistant joint compound to seams and screw holes. Sand smooth once dry, then prime with a stain-blocking primer before painting.
Treating surrounding areas to prevent recurrence
Address the moisture source that caused the original mold growth. Fix leaky pipes, improve ventilation, or repair roof damage. Without eliminating excess moisture, mold will return.
Clean adjacent walls and surfaces within 3 feet of the repair area using a solution designed for mold removal. Wipe down with a damp cloth and allow to air dry.
Apply mold-inhibiting primer to all repaired surfaces and surrounding areas. This creates a protective barrier that resists future mold growth. Use antimicrobial paint for added protection in high-moisture areas.
Monitor the repaired area for several weeks after completion. Check regularly for signs of moisture or new mold growth. Install a dehumidifier if humidity levels stay above 50% to keep the environment less hospitable to mold.
Common causes of mold on drywall
Mold grows on drywall when moisture gets trapped in or on the material. The most common sources are water leaks, flooding, high humidity levels, and condensation problems.
Water leaks from plumbing or roofs
Plumbing leaks are one of the top reasons mold develops on drywall. Leaking pipes behind walls or under floors can go unnoticed for weeks or months, giving mold plenty of time to grow. Even small drips from pipe joints or worn connections create enough moisture for mold spores to take hold.
Roof leaks work the same way. When shingles crack or flashing fails, water seeps into your attic and ceiling areas. The water soaks into the drywall and stays trapped there. You might not see the damage right away since it often starts in hidden spaces.
Both types of leaks need quick attention. The longer water sits in your walls or ceilings, the more likely mold will spread. Check under sinks, around toilets, and near water heaters regularly for signs of moisture.
Flooding and storm water intrusion
Flooding from heavy storms or burst pipes can soak drywall in minutes. When water rises more than a few inches in your home, it gets absorbed into the bottom sections of your walls. Drywall acts like a sponge and holds that moisture even after you clean up the visible water.
Storm water can also enter through foundation cracks, basement windows, or damaged siding. This creates wet conditions inside your walls where you can't see them. Mold can start growing within 24 to 48 hours after drywall gets wet.
Your drywall might look dry on the surface but still be wet inside. This hidden moisture lets mold grow between the wall layers. If flooding affects your home, you need to dry out the drywall completely or replace the damaged sections.
High indoor humidity and poor ventilation
Indoor humidity levels above 60% create perfect conditions for mold growth. Bathrooms and kitchens produce the most humidity from showers, cooking, and dishwashing. Without proper ventilation, this moisture settles on walls and soaks into the drywall surface.
Poor air circulation makes the problem worse. Rooms without enough airflow trap humid air against walls and ceilings. Closets, basements, and crawl spaces are especially at risk because they typically have limited ventilation.
Common humidity sources include:
- Long hot showers without exhaust fans
- Clothes dryers vented indoors
- Cooking without range hood use
- Too many indoor plants
- Unvented gas appliances
Running exhaust fans during and after moisture-producing activities helps. You should also use dehumidifiers in damp areas to keep humidity levels between 30% and 50%.
Condensation issues in walls and attics
Condensation forms when warm, moist air touches cold surfaces. This happens most often in walls and attics during temperature changes. In winter, warm indoor air can reach cold exterior walls and create water droplets inside the wall cavity.
Your attic faces similar problems. When warm air from your living spaces rises into a cold attic, moisture condenses on the underside of the roof deck and on the back of ceiling drywall. Poor insulation or missing vapor barriers make this worse.
Temperature differences between rooms can also cause condensation. Cold exterior walls in bedrooms or bathrooms are common problem spots. The moisture buildup might seem minor at first, but it accumulates over time and feeds mold growth on your drywall.
Signs you need mold affected drywall repair
Recognizing the warning signs of mold damage early helps you avoid bigger problems down the road. Physical changes to your walls, strange smells, and unexplained health issues all point to moisture problems that require professional attention.
Visible mold growth on walls or ceilings
Mold appears as dark spots, patches, or fuzzy growth on your drywall surfaces. You might see black, green, gray, or brown discoloration spreading across walls or ceilings. These visible signs often start small in corners or near water sources like bathrooms and kitchens.
The mold you see on the surface is usually just part of the problem. When mold grows on the front of your drywall, it often means more extensive growth exists behind it. Mold penetrates into the porous material of drywall, making surface cleaning ineffective.
Check areas around windows, under sinks, and near pipes regularly. Even small patches of visible mold growth indicate moisture problems that need immediate repair.
Musty odors in your home
A persistent musty or earthy smell in specific rooms signals hidden mold growth. This odor comes from microbial volatile organic compounds that mold releases as it feeds on drywall materials. The smell often gets stronger in humid weather or when you turn on your heating or cooling system.
You might notice the odor in closets, basements, or rooms without obvious water damage. The smell sticks around even after cleaning and using air fresheners. If you detect this distinct musty scent, mold is likely growing inside your walls where you cannot see it.
Trust your nose when something seems off. Persistent odors mean you need professional inspection of your drywall.
Warping, bubbling, or discoloration of drywall
Water-damaged drywall repair becomes necessary when you notice physical changes to your wall surfaces. Your walls might bulge outward or develop bubbles under the paint. You could see the drywall bowing or sagging in certain spots.
Discoloration shows up as yellow, brown, or copper-colored stains on walls and ceilings. These water stains indicate moisture has penetrated your drywall, creating ideal conditions for mold growth. Peeling or cracking paint also points to moisture problems beneath the surface.
The paper backing on drywall absorbs water easily. Once saturated, the material loses its structural integrity and becomes a breeding ground for mold. These visible deformities mean the damage has progressed beyond simple cleaning.
Health symptoms like allergies or respiratory irritation
Mold exposure triggers physical reactions in many people. You might experience sneezing, coughing, or a runny nose that gets worse at home. Your throat could feel scratchy or irritated for no clear reason.
Some people develop headaches, fatigue, or difficulty breathing when mold spores circulate through their living spaces. Skin rashes and watery eyes are common reactions to mold in your environment. These symptoms often improve when you leave your home and return when you come back.
Pay attention if multiple family members develop similar symptoms at the same time. Children, elderly individuals, and people with existing respiratory conditions show stronger reactions to mold exposure. Your body's response to hidden mold serves as an important warning sign that your drywall needs professional evaluation and repair.
The professional mold affected drywall repair process
Professional mold remediation follows strict safety protocols and industry standards to fully remove mold from your walls and prevent it from returning. The process includes thorough inspection, proper containment, careful removal of damaged materials, and complete restoration of your walls.
Inspection and moisture mapping
A certified mold professional starts by examining your entire home to find all affected areas. They use moisture meters and thermal imaging cameras to detect water behind walls where mold often hides. This step identifies the moisture source causing the problem, whether it's a leaky pipe, roof damage, or poor ventilation.
The inspector documents the extent of mold growth and measures affected areas in square feet. They check adjacent rooms and spaces to ensure mold hasn't spread through air vents or wall cavities. Professionals also test moisture levels in materials like wood framing and insulation that sit behind your drywall.
Containment and air filtration
Professionals seal off the work area with heavy plastic sheeting to stop mold spores from spreading to clean areas of your home. They create negative air pressure using specialized fans that push contaminated air outside through HEPA filters. This setup ensures spores don't travel through doorways or ventilation systems.
Workers set up multiple containment barriers depending on the size of the affected area. Small jobs might need single-layer containment, while larger projects require double or triple barriers. They also cover heating and cooling vents with plastic and tape to protect your HVAC system.
Air scrubbers with HEPA filters run continuously during the entire removal process. These machines capture 99.97% of airborne mold spores and other particles.
Safe removal of mold-infested drywall
Technicians wear full protective gear including respirators, gloves, and disposable suits before starting demolition. They cut out moldy drywall at least 12 inches beyond visible mold growth to ensure complete removal. The drywall is cut carefully to avoid releasing excessive spores into the air.
Workers spray the drywall with water before removal to minimize airborne spores during cutting and handling. They place moldy materials directly into sealed plastic bags rated for hazardous waste. All contaminated drywall, insulation, and other porous materials get removed and properly disposed of according to local regulations.
The removal extends to studs and framing if mold has penetrated deep into these materials.
Cleaning and disinfecting adjacent materials
After removing moldy drywall, professionals clean all exposed framing, studs, and non-porous surfaces with antimicrobial solutions. They use HEPA vacuums on wood framing to remove surface mold and spores before applying cleaning agents. Wire brushes help scrub mold from rough wood surfaces.
Professional-grade fungicides get applied to all exposed structural materials to kill remaining mold and prevent regrowth. These products penetrate wood grain more effectively than household cleaners. Technicians allow treated surfaces to dry completely before moving forward, often using industrial dehumidifiers and fans to speed the process.
They verify moisture readings are below 16% in all materials before proceeding with repairs.
Drywall replacement and finishing
Professionals install new drywall only after confirming all surfaces are clean, dry, and mold-free. They often use mold-resistant drywall (purple board or green board) in areas prone to moisture like bathrooms and basements. New drywall gets secured to studs with proper spacing and attachment.
Mold-resistant joint compound covers seams and screw holes during the finishing process. This compound contains antimicrobial additives that resist future mold growth. Workers apply multiple coats, sanding between applications to create smooth surfaces.
The new drywall receives primer designed to seal surfaces and block stains before final painting. Professionals match textures and finishes to blend repairs seamlessly with existing walls.
Final inspection to ensure mold is eliminated
A thorough post-remediation inspection confirms the job meets industry standards and safety requirements. Professionals take air samples and surface samples to verify mold levels have returned to normal. These samples get sent to independent labs for analysis.
The inspector checks moisture readings throughout the repaired area and surrounding spaces. They verify the moisture source has been properly fixed and won't cause future problems. Visual inspection confirms no mold growth remains on any surfaces.
You receive detailed documentation including photos, moisture readings, and lab results showing your home is safe. The inspection also confirms proper ventilation and humidity levels to prevent mold from returning.
DIY vs professional mold affected drywall repair
Small mold spots might seem manageable on your own, but dealing with mold-affected drywall involves serious health risks and technical challenges that often require professional expertise. The decision between DIY and professional repair depends on the extent of damage, your health situation, and what's lurking behind those walls.
Risks of attempting DIY removal
DIY mold removal on drywall can expose you to dangerous spores that spread easily during cleaning. When you disturb mold without proper containment, it releases millions of microscopic spores into your home's air. These spores settle on furniture, carpets, and other surfaces, creating new mold colonies.
You might miss the root cause of the problem. Mold grows because of moisture issues like leaks, condensation, or water damage. If you only clean the visible mold without fixing the moisture source, it will return within weeks or months.
Most homeowners lack the proper equipment for safe mold removal. You need more than bleach and a scrub brush. Professional-grade respirators, sealed protective clothing, negative air machines, and HEPA filters are necessary for safe removal. Without these tools, you're breathing in harmful spores and contaminating your entire home.
Hidden mold behind walls or in insulation
Mold rarely stays on the surface of drywall. Once moisture penetrates the drywall, mold grows inside the wall cavity, on the paper backing, and throughout the insulation. You can't see this hidden mold by looking at the wall's surface.
Professional mold remediation teams use moisture meters and thermal imaging cameras to find hidden mold. These tools detect moisture patterns and temperature differences that indicate mold growth behind walls. Without this equipment, you're guessing about the true extent of the problem.
Removing affected drywall is only part of the solution. The studs, insulation, and other materials behind the drywall often need treatment or replacement. If you cut out moldy drywall but leave contaminated insulation in place, you've wasted your time and money.
Safety hazards with mold exposure
Mold exposure causes respiratory problems, allergic reactions, and other health issues. People with asthma, allergies, or weakened immune systems face serious risks when exposed to mold spores. Even healthy individuals can develop sensitivity to mold after repeated exposure.
Black mold (Stachybotrys chartarum) produces mycotoxins that cause severe health problems. Symptoms include difficulty breathing, chronic coughing, headaches, fatigue, and skin irritation. Long-term exposure can lead to more serious conditions affecting your nervous system.
If mold resulted from sewage backup or contaminated water, the health risks multiply. This type of mold contains bacteria and pathogens that require specialized cleaning protocols. You should never attempt DIY removal in these situations.
Advantages of hiring certified professionals
Certified mold remediation professionals follow strict protocols established by the IICRC (Institute of Inspection, Cleaning and Restoration Certification). They contain the work area with plastic sheeting and negative air pressure to prevent spore spread. This containment keeps the rest of your home safe during removal.
Professional teams have industrial-strength equipment including HEPA air scrubbers, commercial dehumidifiers, and antimicrobial treatments. They remove all affected materials, treat remaining surfaces, and verify complete mold removal with post-remediation testing.
Licensed professionals carry insurance that protects you if something goes wrong. They also provide documentation of their work, which you'll need for insurance claims and future home sales. Many offer warranties guaranteeing their work for several years.
Professional mold repair addresses the moisture source along with the mold itself. They identify leaks, improve ventilation, and recommend waterproofing solutions to prevent future growth. This comprehensive approach saves you money compared to repeated DIY attempts that only treat symptoms.
Preventing mold on drywall in the future
Stopping mold before it starts requires fixing moisture problems, managing humidity levels, checking for hidden water issues, and using the right materials in areas prone to dampness.
Fix leaks and water intrusion promptly
Water leaks are the main cause of mold growth on drywall. When you spot a leak from pipes, roofs, or windows, you need to repair it right away.
Even small drips can create enough moisture for mold to grow within 24 to 48 hours. Check under sinks, around toilets, and near appliances that use water like dishwashers and washing machines.
After you fix a leak, dry the affected area completely. Use fans, dehumidifiers, or open windows to speed up drying. If the drywall stays wet for too long, mold will likely develop even after you stop the water source.
Pay attention to your roof and gutters too. Clogged gutters can cause water to back up and seep into walls. Missing shingles or damaged flashing let rainwater enter your home and soak the drywall behind your walls.
Control indoor humidity and improve ventilation
Keeping humidity below 60% prevents mold from growing on your drywall. Use a hygrometer to measure moisture levels in your home.
Run exhaust fans in bathrooms during showers and for at least 30 minutes after. Kitchen exhaust fans should be on when you cook, especially when boiling water or steaming food.
A dehumidifier helps in basements and other damp spaces where humidity naturally builds up. Empty the water reservoir regularly or set it to drain continuously.
Open windows when weather permits to let fresh air circulate through your home. Good airflow stops moisture from settling on surfaces. Don't push furniture directly against exterior walls because this blocks air circulation and creates cold spots where condensation forms.
Regular inspections for hidden moisture
Mold often grows behind walls where you can't see it. Check for signs like water stains, peeling paint, bubbling drywall, or musty smells.
Use a moisture meter to test walls in areas prone to dampness like basements, bathrooms, and exterior walls. These devices detect moisture inside drywall before visible damage appears.
Inspect areas around windows and doors for condensation or water marks. Look at the drywall near your water heater, HVAC system, and refrigerator ice maker lines. These spots commonly develop leaks that go unnoticed.
Check your attic for proper insulation and ventilation. Poor attic ventilation causes condensation that drips down and soaks into ceiling drywall.
Use mold-resistant drywall in high-risk areas
Mold-resistant drywall has a fiberglass facing instead of paper, which doesn't provide food for mold. Install it in bathrooms, laundry rooms, basements, and kitchens where moisture levels run high.
This type of drywall costs more than standard drywall but provides better protection in damp environments. The fiberglass surface resists water absorption and stops mold from taking hold.
After installation, apply mold-resistant primer and paint. These products contain fungicidal compounds that block mold growth on the surface. They add an extra layer of defense against future problems.
Green board and purple board are common types of moisture-resistant drywall. Purple board offers the best moisture protection and works well behind tile in showers and tub surrounds.
Why choose Michaelis Corporation for mold affected drywall repair
Michaelis Corporation offers complete mold remediation and drywall restoration services with certified specialists, professional-grade equipment, and experience handling projects of all sizes. Their team manages every step from initial mold removal through final drywall replacement and restoration.
Certified mold remediation specialists
Michaelis Corporation employs trained professionals who understand the proper protocols for mold removal and affected drywall repair. These specialists know how to identify the extent of mold growth, contain the affected areas, and remove contaminated materials safely.
The certification and training ensure your home receives treatment that meets industry standards. When you work with certified specialists, you get accurate assessments of the damage and appropriate solutions for your specific situation.
Their team understands which materials need removal and which can be salvaged. This expertise helps prevent unnecessary demolition while ensuring all contaminated drywall gets properly replaced.
Advanced equipment and proven techniques
The company uses professional-grade equipment designed specifically for mold remediation and water damage cleanup. This includes specialized tools for moisture detection, air filtration systems, and industrial dehumidifiers.
Their proven techniques include verified drying processes that help prevent mold regrowth after repair work is complete. Proper drying is essential because mold can begin growing within 24 to 48 hours if moisture remains in building materials.
They follow established protocols for containing work areas to prevent mold spores from spreading to unaffected parts of your property during the removal process. This containment protects your living spaces and belongings.
Full restoration from mold removal to drywall replacement
Michaelis Corporation handles the complete restoration process rather than just removing the mold. After mold removal, they restore affected areas and materials to pre-mold conditions.
This means you don't need to hire separate contractors for demolition, mold removal, and reconstruction. Their team manages the entire workflow from start to finish.
The restoration work includes:
- Removing contaminated drywall and insulation
- Treating affected framing and structural components
- Installing new drywall
- Finishing surfaces with taping, mudding, and texturing
- Priming and painting to match existing walls
They also address the underlying moisture problems that caused the mold growth in the first place. Without fixing these root causes, mold problems typically return.
Experience with both residential and commercial properties
The company has worked on mold remediation and drywall repair projects across different property types and sizes. This experience means they understand the unique requirements of various buildings.
Residential projects might involve bedrooms, bathrooms, basements, or crawl spaces where mold commonly develops. Commercial properties often require work during specific hours to minimize business disruption.
Their team handles insurance documentation and communicates directly with adjusters when needed. This support simplifies the claims process for you.
They've dealt with damage from various sources including water leaks, flooding, storm damage, and humidity issues. Each situation requires specific knowledge about how mold develops and spreads in different conditions.
Conclusion
Mold affected drywall repair requires quick action and the right approach. You need to assess the damage first, then decide whether to clean or replace the affected sections. Small areas with surface mold can often be cleaned, but deep contamination means you need to remove and replace the drywall.
Your safety comes first during any mold repair project. You should wear proper protective equipment including gloves, goggles, and a respirator. Make sure you contain the work area to prevent mold spores from spreading to other parts of your home.
You must fix the underlying moisture problem or mold will return. This means repairing leaks, improving ventilation, and controlling humidity levels in your home. Regular inspection of areas prone to moisture helps you catch problems early.
Professional help makes sense for large areas of contamination or when mold appears behind walls. Experts have specialized tools to detect hidden moisture and ensure complete removal.
Your repaired drywall can last for years when you address both the mold and its cause. Take preventive measures seriously to protect your home and health. Keep humidity below 50% and fix water problems immediately when they occur.
Schedule professional mold affected drywall repair with Michaelis Corporation to contain the affected area, remove and replace contaminated drywall safely, and correct the underlying moisture issue to help prevent recurrence.

.avif)