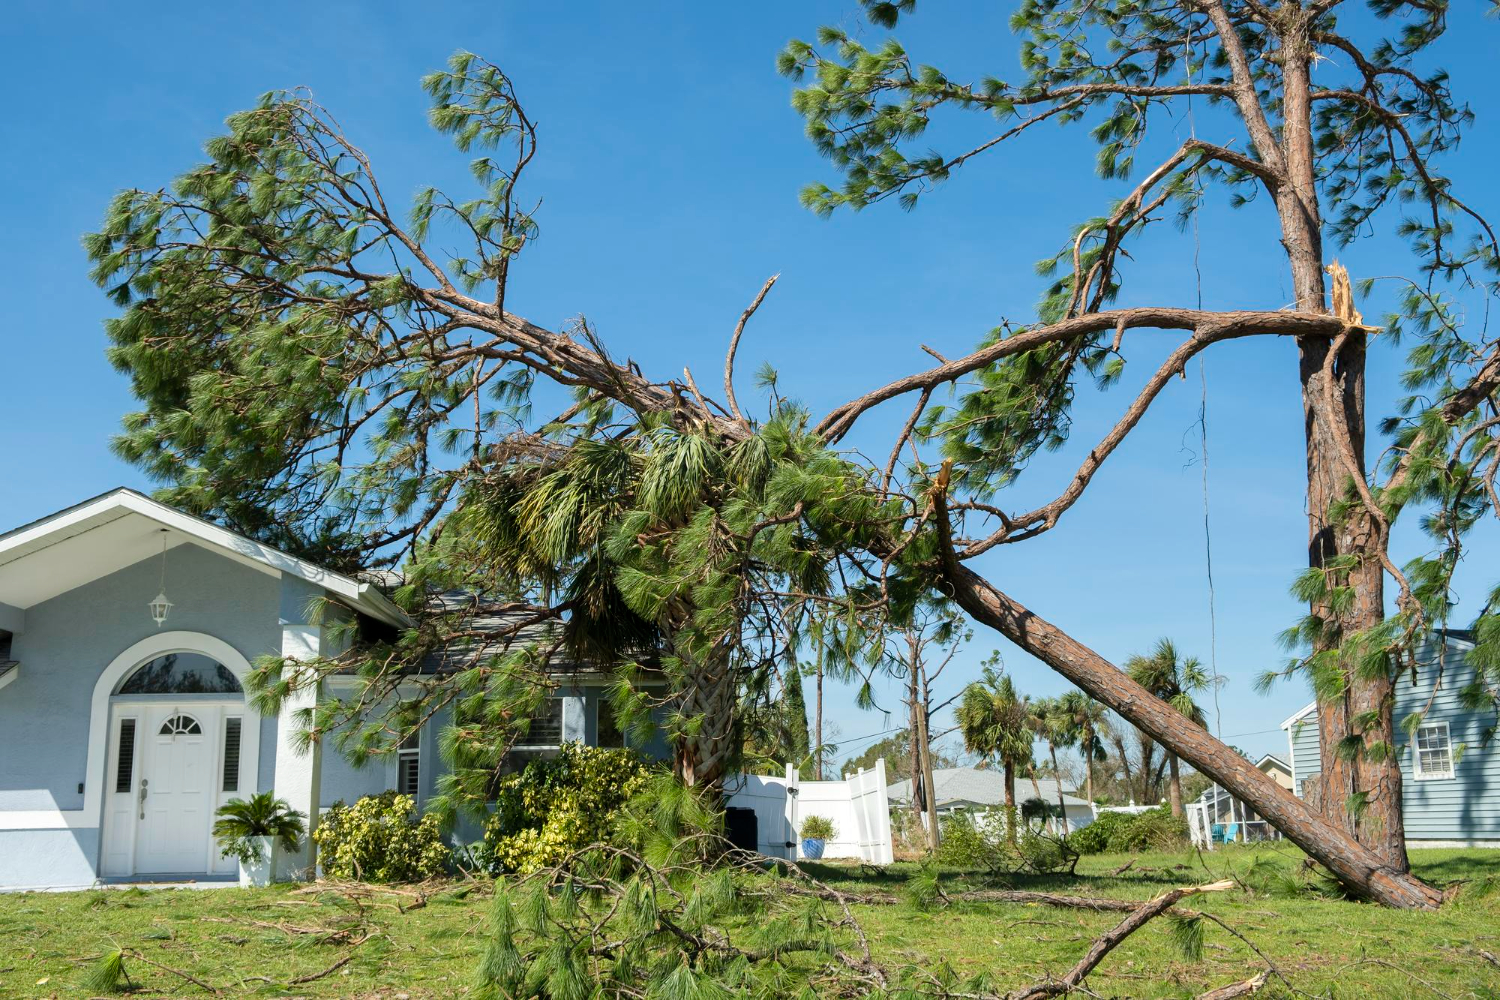
Wind damage can turn a peaceful day into a homeowner's nightmare in just minutes. Strong winds from storms can tear off roof shingles, break windows, damage siding, and leave homes exposed to water and further problems. Acting quickly after wind damage happens is the key to preventing bigger issues like water damage, mold growth, and costly structural repairs.
Most homeowners don't know what steps to take first when they see wind damage to their property. The restoration process involves more than just fixing what looks broken on the surface. Water can get inside through damaged areas, creating hidden problems that grow worse over time.
Understanding the wind damage restoration process helps homeowners make smart choices about repairs, insurance claims, and hiring the right professionals. From taking the first steps after a storm to working with restoration companies, knowing what to expect can save both time and money during recovery.
In this article, you’ll learn how to handle wind damage restoration effectively—from initial safety steps to full property recovery.
Below, we’ll walk through each important aspect.
- First steps right after wind damage
- Wind damage restoration cleanup made simple
- Repair options and how the timeline usually unfolds
- Costs, coverage, and claim basics
- Choosing residential wind damage companies with confidence
Keep reading! From taking the first steps after a storm to working with restoration companies, knowing what to expect can save both time and money during recovery.
First steps right after wind damage
Moving quickly after wind damage can prevent more harm to your property and speed up repairs. The first hours focus on safety checks, protecting exposed areas from weather, and recording damage for insurance.
Safety checks for downed lines, gas, and structural issues
Check for electrical hazards first. Downed power lines can stay live for hours after a storm. Stay at least 35 feet away from any fallen wires. Even lines that look dead can carry electricity.
Call the power company right away if lines are down. Don't try to move branches or debris near electrical equipment. Water and electricity together create deadly conditions.
Look for gas leaks next. A rotten egg smell means natural gas is escaping. Turn off the gas at the meter if it's safe to reach. Don't use matches, lighters, or electrical switches near a suspected leak.
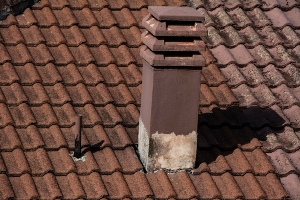
Check the home's structure carefully. Look for sagging rooflines, cracked walls, or tilted chimneys. These signs mean the building might not be safe to enter.
Walk around the outside first before going inside. Check for loose siding, broken windows, or damaged doors. If the structure looks unstable, stay out and call a professional.
Fast board-ups and roof tarps to stop water intrusion
Cover broken windows and doors immediately. Use plywood boards that are at least ¾ inch thick. Secure boards with screws, not nails, for better hold.
Measure each opening and cut boards to fit. Leave no gaps where water can get through. Use weatherstripping around edges for extra protection.
Tarp damaged roof areas within hours. Blue plastic tarps work for temporary fixes. Pull the tarp over the roof peak by at least 4 feet. This prevents water from backing up under the tarp.
Secure tarps with 2x4 boards and screws. Don't rely on just nails or staples. Wind can easily pull these loose. Weight down the edges with sandbags or lumber.
Work safely or hire professionals. Wet roofs are extremely slippery. Many people get hurt trying to climb on damaged roofs. Professional roofers have the right equipment and experience for emergency repairs.
Photos, videos, and notes that speed up the insurance claim
Take pictures before touching anything. Insurance companies need to see damage exactly as the storm left it. Moving debris or starting cleanup can hurt your claim.
Photograph all damaged areas from multiple angles. Include wide shots that show the whole area and close-ups of specific damage. Take pictures of damaged personal items too.
Record video while walking through damaged areas. Speak into the camera to describe what you see. Videos capture details that photos might miss.
Write down what happened and when. Note the date, time, and weather conditions during the storm. List all damaged items with their age and estimated value.
Keep all receipts for emergency repairs like tarps and plywood. Insurance often covers these costs. Store all photos, videos, and notes in multiple places so you don't lose them.
Wind damage restoration cleanup made simple
Quick action prevents small problems from becoming major issues. Proper debris removal, moisture control, and sanitization protect your home from additional damage.
Debris removal and tree limb handling without new damage
Safety comes first when removing storm debris. Turn off electricity to damaged areas before starting any cleanup work.
Clear debris in this order:
- Small branches and leaves
- Larger limbs and wood pieces
- Damaged roofing materials
- Broken glass and metal
Use proper tools for each job. Chainsaws work best for large tree limbs. Hand saws handle smaller branches safely.
Never pull debris off damaged roofs. This can cause more structural damage. Instead, cut branches close to where they rest on the roof.
Wear thick gloves and safety glasses. Sharp wood and metal pieces can cause serious cuts. Steel-toed boots protect feet from heavy falling debris.
Pile debris away from the house. Keep different materials separate for easier disposal. Many cities have special pickup services after major storms.
Drying wet rooms before mold takes hold
Water damage spreads fast after wind storms. Broken windows and damaged roofs let rain soak into walls and floors.
Remove standing water immediately. Use pumps for deep water. Wet vacuums work well for smaller amounts.
Essential drying equipment:
- Industrial fans for air movement
- Dehumidifiers to pull moisture from air
- Heaters to speed up drying process
Open all doors and windows when weather permits. Fresh air helps remove moisture naturally.
Pull up wet carpet within 24-48 hours. Padding underneath holds water and grows mold quickly. Hardwood floors need special drying to prevent warping.
The EPA advises that water-damaged areas should be fully dried within 24 to 48 hours to prevent mold growth and its associated health and structural risks.
Check hidden areas like wall cavities and under stairs. Use moisture meters to find all wet spots. Document everything with photos for insurance claims.
Run dehumidifiers until moisture levels return to normal. This usually takes 3-5 days depending on damage severity.
Sanitizing and odor control after rain-soaked interiors
Flood water carries bacteria and other harmful substances. All affected surfaces need proper cleaning and sanitizing.
Mix bleach solutions carefully. Use one cup of bleach per gallon of water for hard surfaces. Never mix bleach with other cleaning products.
Scrub all hard surfaces with the bleach solution. This includes walls, floors, and furniture that can be saved. Let surfaces air dry completely.
Remove porous materials that stayed wet for more than 48 hours. This includes drywall, insulation, and fabric items. These materials grow mold easily.
Professional-grade sanitizers work better than household products:
- Antimicrobial sprays kill bacteria and viruses
- Enzyme cleaners break down organic odors
- Ozone generators remove stubborn smells
Replace HVAC filters after storm cleanup. Dirty filters spread contaminated air throughout the house. Clean all ductwork that got wet.
Use fans to keep air moving during the sanitizing process. Good airflow prevents new mold growth and helps cleaning products work better.
Repair options and how the timeline usually unfolds
Wind damage repairs follow a specific order that prioritizes safety and prevents further damage. Most restoration projects start with temporary fixes and move to permanent solutions over several weeks or months.
Temporary fixes vs permanent repairs: what comes first
Emergency repairs happen first to protect the property from more damage. These quick fixes include tarping damaged roofs, boarding up broken windows, and covering holes in siding.
Immediate temporary repairs:
- Roof tarping within 24-48 hours
- Window boarding or plastic sheeting
- Temporary fence installation for security
- Water extraction if needed
Permanent repairs start only after insurance adjusters inspect the damage. This process can take 3-14 days depending on the storm's size and insurance company workload.
Contractors focus on structural safety first. They repair load-bearing walls, fix foundation issues, and restore the building envelope. Cosmetic repairs like paint and flooring come last.
The temporary repair phase typically costs 5-15% of total restoration expenses. However, skipping these steps often doubles the final repair bill due to water damage and theft.
What gets done day one, week one, and beyond
Day 1-3: Emergency response
- Safety assessment and utility shutoffs
- Debris removal from immediate areas
- Tarp installation and window boarding
- Water extraction and drying equipment setup
Week 1: Damage documentation
- Professional inspection and photo documentation
- Insurance claim filing and adjuster scheduling
- Contractor estimates and material ordering
- Permits application for major repairs
Week 2-4: Structural repairs begin
- Roof deck and shingle replacement
- Siding and window installations
- Electrical and plumbing system repairs
- HVAC system restoration
Month 2-3: Interior restoration
- Drywall replacement and painting
- Flooring installation
- Cabinet and fixture replacement
- Final inspections and cleanup
Why some materials delay restoration and how to plan around it
Material shortages commonly extend restoration timelines by 2-8 weeks. Specialty items like custom windows, specific roof tiles, and matching siding create the longest delays.
Common delay-causing materials:
- Custom windows: 6-12 weeks
- Metal roofing: 4-8 weeks
- Specialty siding: 3-6 weeks
- HVAC units: 2-4 weeks
Contractors can reduce delays by ordering materials immediately after damage assessment. They often suggest similar alternatives that match the home's appearance but arrive faster.
Insurance companies sometimes cover upgrade costs when exact materials aren't available. Property owners should discuss these options early in the claims process.
Planning around delays means accepting temporary solutions for longer periods. Some families choose alternative housing until major work finishes rather than living through months of construction noise and dust.
Costs, coverage, and claim basics
Wind damage restoration costs vary widely based on structural factors and insurance coverage details. Understanding how adjusters evaluate damage and what homeowners pay out-of-pocket helps avoid financial surprises during the claims process.
From 2018 to 2022, nearly 49% of all property insurance claims in the U.S. were caused by wind or hail, with an average payout of $13,511, according to This Old House.
What drives price: roof type, access, and extent of damage
Roof material significantly impacts restoration costs. Asphalt shingles cost less to replace than tile, slate, or metal roofing systems.
Building height and accessibility affect labor expenses. Single-story homes cost less to repair than multi-story structures requiring special equipment.
Damage severity determines whether repairs or full replacement are needed. Minor shingle loss costs hundreds of dollars. Complete roof replacement ranges from $8,000 to $25,000 depending on home size.
Common cost factors include:
- Materials needed for repairs
- Labor requirements and safety equipment
- Permits and inspections
- Structural damage beyond roofing
Geographic location influences pricing due to local labor rates and material availability. Areas prone to frequent storms often have higher baseline costs.
Storm restoration vs remediation and how adjusters define the work
Insurance adjusters distinguish between restoration and remediation when evaluating claims. Restoration returns property to its pre-damage condition using similar materials and methods.
Remediation involves emergency measures to prevent further damage. This includes tarping, water extraction, and temporary repairs.
Adjusters categorize work differently based on urgency and scope. Emergency remediation typically gets approved quickly. Full restoration requires detailed estimates and material specifications.
Insurance companies prefer restoration over replacement when possible. They evaluate whether damaged components can be effectively repaired rather than replaced entirely.
Adjusters document everything with photos and measurements. They create repair scopes that contractors must follow to ensure coverage approval.
Deductibles, documentation, and avoiding surprise out-of-pocket costs
Wind damage deductibles often differ from standard homeowners policy deductibles. Many policies use percentage-based wind deductibles ranging from 1% to 5% of dwelling coverage.
A $300,000 home with 2% wind deductible means $6,000 out-of-pocket before coverage begins.
Proper documentation prevents claim disputes and unexpected costs. Homeowners should photograph all damage immediately after storms occur.
Keep detailed records of temporary repairs and emergency expenses. Save receipts for tarps, boarding materials, and professional services.
Review policy language before filing claims. Some policies exclude certain types of wind damage or require specific documentation timeframes.
Essential documentation includes:
- Pre-storm property photos
- Damage photos from multiple angles
- Professional inspection reports
- Contractor estimates and invoices
Contact insurance companies within required reporting periods. Delayed reporting can result in claim denials or reduced payouts.
Choosing residential wind damage companies with confidence
Finding the right restoration company requires checking key credentials and understanding what services they provide. Homeowners should ask detailed questions about costs and guarantees before signing any contracts.
Credentials, 24/7 response, and full storm cleanup capability
Licensed and insured companies protect homeowners from liability during repairs. Check that the company holds proper state licenses for construction and restoration work. Verify their insurance covers both workers and property damage.
24/7 emergency response matters when wind damage strikes. Storm damage gets worse when left untreated. Water can enter through broken windows and damaged roofs within hours.
Look for companies that offer immediate board-up services. They should secure openings and prevent further damage right away. Quick response prevents mold growth and additional water damage.
Full-service restoration capabilities save time and hassle. The best companies handle everything from debris removal to final repairs. They should offer water extraction, structural repairs, and content cleaning under one roof.
Ask about their equipment and staff size. Larger teams can complete work faster during busy storm seasons.
Questions to ask about scope, pricing, and warranty terms
Get detailed written estimates that break down all costs. Ask what work is included and what costs extra. Some companies charge separately for debris removal or emergency services.
Request information about their billing process. Find out if they work directly with insurance companies. This can speed up claims and reduce out-of-pocket costs.
Ask about project timelines and completion dates. Weather and material availability can cause delays. Good companies provide realistic schedules and regular updates.
Warranty coverage varies between companies. Ask what parts of the work are covered and for how long. Some offer warranties on materials while others cover both materials and labor.
Get warranty terms in writing before work begins.
24/7 local help: Michaelis can secure, clean up, and start drying today
Local companies respond faster than distant competitors. They know the area and understand common wind damage patterns. Michaelis serves the community with experienced teams ready for emergency calls.
Immediate securing services prevent additional damage. Our crews board up windows, tarp roofs, and remove dangerous debris. We work quickly to protect your property from weather and intruders.
Professional drying equipment starts working within hours of arrival. We use industrial fans, dehumidifiers, and moisture meters to prevent mold growth. Fast drying saves flooring, walls, and personal belongings.
Our team handles insurance documentation and works directly with adjusters. This speeds up claims processing and gets repairs started sooner.
Conclusion
Wind damage restoration requires quick action and careful planning. Property owners who act fast can prevent more problems and save money.
Safety comes first in any restoration project. People should never try to fix major damage themselves.
Professional restoration companies have the right tools and skills. They can assess damage correctly and make proper repairs.
Insurance claims move faster when homeowners have good documentation. Photos and written records help prove the extent of damage.
Quality repairs protect against future storms. Professional work often comes with warranties and guarantees.
The restoration process takes time but gets properties back to normal. Most homeowners can return to their regular routines within weeks or months.
Wind damage affects both homes and businesses. Commercial properties need the same careful attention as residential buildings.
Prevention helps reduce future damage. Property owners can strengthen roofs, trim trees, and secure loose items around buildings.
Restoration companies help people through stressful times. They handle repairs so property owners can focus on other important matters.
Good restoration work makes buildings stronger than before. Modern materials and techniques often improve on original construction.
People who prepare for storms and act quickly after damage have the best outcomes. Professional help makes the difference between quick recovery and long delays.
Schedule your wind damage restoration service today to protect your property and start repairs without delay.

.avif)