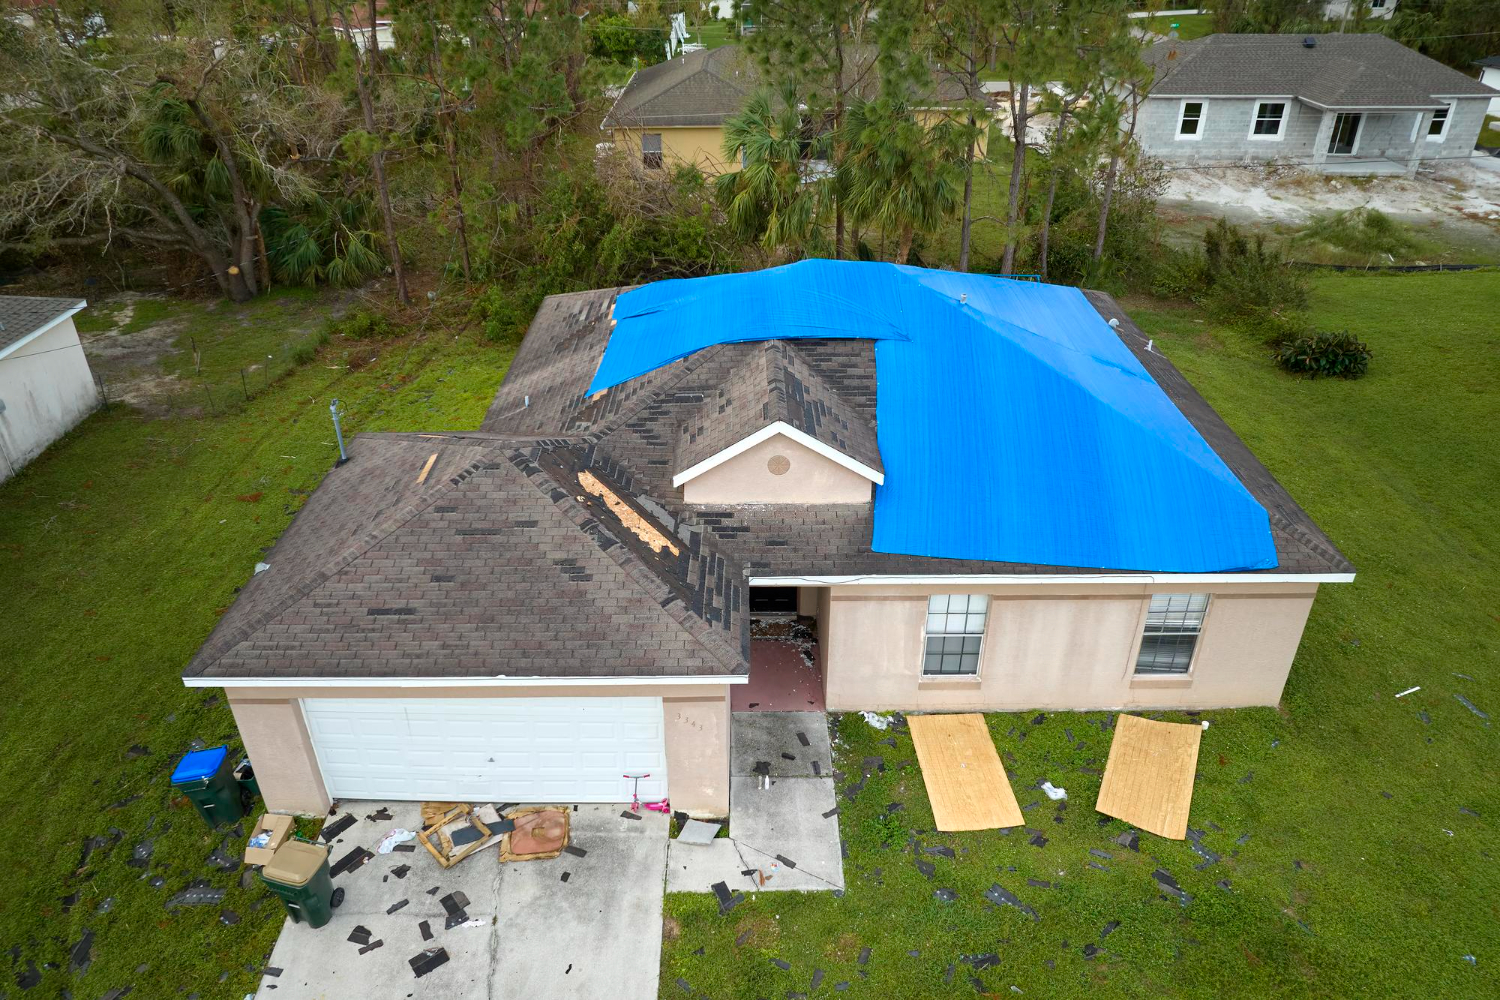
When a storm damages your roof, every minute counts before more water enters your home. Emergency roof tarping provides immediate protection from weather damage while you wait for permanent repairs. This temporary solution can save thousands of dollars in water damage and give homeowners peace of mind during stressful situations.
Professional roof tarping involves more than throwing a tarp over damaged areas. The process requires proper materials, secure installation techniques, and knowledge of how to protect a home without causing additional damage. Many homeowners wonder about costs, what to expect from service providers, and how quickly they can get help.
From the first steps after damage occurs to choosing the right contractor, knowing the process ahead of time can make a difficult situation much easier to handle.
In this article, you’ll learn how roof tarping services protect your home after storm damage, plus what they cost, how long they last, and who to call.
Below, we’ll walk through each important aspect.
- First-hour moves after roof damage
- What a proper emergency roof tarp includes
- Roof tarping cost and fees explained
- From tarp to permanent fix
- Choosing roof tarping companies in Indianapolis
Keep reading! Understanding roof tarping services helps property owners make smart decisions when disaster strikes.
First-hour moves after roof damage
Acting quickly in the first hour after roof damage can save thousands of dollars in repairs and protect belongings from water damage. The key steps involve checking for dangers, stopping water flow, and documenting everything for insurance.
Safety checks, leak control, and quick photos for claims
Check for immediate dangers before entering damaged areas. Look for sagging ceilings, exposed electrical wires, or structural damage that could cause collapse.
Turn off electricity to affected rooms if water is present. Water and electricity create deadly combinations that require immediate attention.
Place buckets or containers under active leaks to protect floors and furniture. Large trash cans or storage bins work better than small bowls for heavy leaks.
Move electronics, important documents, and valuable items away from wet areas immediately. Even small amounts of water can destroy these items within minutes.
Take photos of all damage before moving anything. Insurance companies need clear pictures showing:
- Roof holes or missing shingles
- Water stains on ceilings and walls
- Damaged furniture and belongings
- Standing water or active leaks
Use your phone's timestamp feature to prove when damage occurred. Take wide shots of entire rooms and close-ups of specific damage.
Tarping a roof safely before the next round of rain
Never attempt roof work during storms or on wet surfaces. Wait for safe conditions or call professionals for emergency tarping services.
Gather necessary materials before going on the roof:
- Heavy-duty tarp (at least 6mm thick)
- 2x4 lumber boards
- Roofing nails or screws
- Hammer or drill
- Safety rope and harness
Start tarping from the highest point of the roof and work downward. This prevents water from flowing under the tarp edges.
Extend the tarp at least 4 feet beyond the damaged area on all sides. Secure it with lumber strips nailed every 12 inches along the edges.
Create proper drainage by ensuring the tarp slopes away from the house. Trapped water can cause additional structural damage or tarp failure.
Professional tarping services work 24/7 and carry proper insurance. They complete the job faster and safer than most homeowners can manage alone.
What to save and what to discard to avoid bigger repairs
Save items that can be dried within 24-48 hours. Wood furniture, books, and documents often recover if dried quickly in a warm, ventilated area.
Discard porous materials that absorbed contaminated water. Insulation, drywall, and carpeting often harbor mold and bacteria that spread rapidly.
Electronics require immediate attention. Remove batteries, dry external surfaces, and avoid turning them on until completely dry. Professional restoration may save expensive items.
Remove wet insulation immediately. Soaked insulation loses effectiveness and creates perfect conditions for mold growth within the wall cavities.
Document everything before disposal. Take photos of damaged items with visible price tags or receipts when possible for insurance claims.
Sort belongings into three categories:
- Keep: Items with minimal water exposure
- Professional cleaning: Valuable items needing restoration
- Discard: Heavily damaged or contaminated materials
Act within the first 24 hours to prevent mold growth. Mold can start developing within this timeframe and creates much larger repair costs later.
What a proper emergency roof tarp includes
A proper emergency roof tarp installation requires secure anchor points, complete coverage of roof features, and materials designed to last through multiple weather events. These elements work together to prevent water damage and protect the home's interior.
Anchor points, overlap, and edge sealing that stay put
Proper anchor points form the foundation of any effective roof tarp system. The tarp must attach to solid roof decking or rafters, never just to shingles or gutters.
Key anchor requirements:
- Wood screws with washers every 12-18 inches along edges
- 2x4 lumber strips to distribute weight and prevent tearing
- Minimum 6-inch overlap on all sides of the damaged area
Edge sealing prevents wind uplift and water infiltration. The tarp edges must lay flat against the roof surface without gaps or bubbles.
Professional installations use roofing cement or sealant tape along all edges. This creates a watertight barrier that can withstand heavy rain and strong winds.
The overlap extends beyond the damaged area in all directions. This extra coverage accounts for wind-driven rain and ensures complete protection of the vulnerable area.
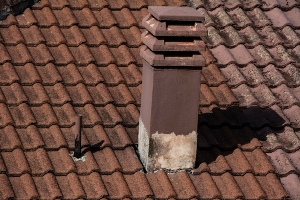
Covering vents, valleys, and chimneys without trapping water
Roof features like vents, valleys, and chimneys require special attention during tarp installation. These areas collect water naturally and can cause major problems if not handled correctly.
Valley coverage techniques:
- Tarp must follow the valley's natural water flow
- No wrinkles or folds that could trap debris
- Extra securing points where tarp changes direction
Vents need to remain functional while staying protected. The emergency roof tarp should cover damaged areas around vents but not block their purpose entirely.
Chimney installations require careful measuring and cutting. The tarp material wraps around the chimney base with proper flashing techniques to direct water away from the structure.
Water must flow naturally off the tarp surface toward gutters or roof edges. Any installation that creates pools or redirects water toward the home's interior fails to provide proper protection.
Roof tarp life span and how long it should last and why
A quality emergency roof tarp typically lasts 30 to 90 days when properly installed and maintained. Heavy-duty materials and correct installation techniques extend this timeframe significantly.
Factors affecting tarp life span:
- UV exposure from direct sunlight
- Wind stress and uplift forces
- Temperature changes causing expansion and contraction
- Debris impact from storms
Professional-grade tarps use reinforced polyethylene or vinyl materials. These resist tearing and UV damage better than standard blue tarps found at hardware stores.
Regular inspection every 2-3 weeks helps identify problems early. Loose anchor points, small tears, or edge lifting require immediate attention to prevent complete failure.
Weather conditions directly impact how long the tarp remains effective. Areas with frequent storms or extreme temperatures may need replacement sooner than locations with mild weather patterns.
The tarp serves as temporary protection only. Permanent repairs should begin as soon as possible to avoid relying on the emergency roof tarp beyond its intended lifespan.
Roof tarping cost and fees explained
According to HomeGuide, standard roof tarping costs $0.70 to $2.00 per square foot, while emergency tarping (after‑hours) ranges from $1.00 to $2.80 per square foot. Several key factors determine the final price, from roof characteristics to material choices and insurance requirements.
According to Angi, most homeowners pay between $150 and $3,300 for roof tarping, with an average around $450
What drives price: height, slope, access, and materials
Roof height significantly impacts tarping costs due to safety requirements and equipment needs. Single-story homes cost less to tarp than multi-story buildings because contractors can work more efficiently at lower heights.
Steep roof slopes increase labor time and safety risks. Contractors charge more for roofs with pitches above 6/12 because they require additional safety equipment and slower installation methods.
Access challenges that raise costs:
- Limited driveway space for equipment
- Landscaping obstacles around the home
- Narrow lot conditions
- Distance from street to roof
Material quality affects both immediate costs and long-term protection. Heavy-duty tarps cost $2-4 per square foot but resist tears better than basic options at $0.50-1.50 per square foot.
Tarp thickness ranges from 6-mil for temporary coverage to 20-mil for extended protection. Thicker materials last longer but require more labor to install properly.
Tarping fee basics: labor, tarps, fasteners, and travel
Labor represents 60-70% of total tarping costs. Professional installation ensures proper securing and reduces risk of tarp failure during storms.
Standard fee breakdown:
- Labor: $300-500 for average roof
- Tarp materials: $100-200
- Fasteners and lumber: $50-100
- Equipment and safety gear: $75-150
Emergency services cost 25-50% more than standard rates. Weekend and holiday calls often include additional surcharges of $100-300.
Travel fees apply when contractors drive more than 20 miles to the job site. Rural locations typically see $50-150 in additional travel costs compared to urban areas.
Minimum service charges range from $200-400 regardless of roof size. Small repairs may hit this minimum while larger roofs exceed it based on square footage pricing.
Insurance paperwork that helps reimbursement move faster
Proper documentation speeds up insurance claims and ensures full reimbursement for tarping expenses. Most policies cover emergency tarping as part of storm damage claims.
Essential paperwork includes:
- Detailed invoice with labor and material breakdown
- Before and after photos of damage
- Weather reports from damage date
- Contractor license and insurance information
Insurance companies typically reimburse tarping costs within 30-60 days when claims include complete documentation. Missing paperwork can delay payments by several weeks.
Contractors who work regularly with insurance companies often provide pre-formatted invoices. These documents include all required information that adjusters need for quick claim processing.
Keep receipts for any additional materials or emergency repairs. Insurance policies may cover temporary housing costs if tarping cannot adequately protect the home's interior.
From tarp to permanent fix
Roof damage requires quick action to prevent worse problems. Temporary solutions like tarps and dry-ins protect homes until contractors can make lasting repairs.
Temporary dry-in vs roof tarp and when each makes sense
Roof tarps work best for small to medium damage areas. They use heavy-duty plastic or vinyl materials secured with nails or screws. Tarps cost less and install faster than other options.
Temporary dry-ins involve more complete coverage using materials like plywood and roofing paper. This method works better for large damaged areas or when storms damage multiple roof sections.
When to choose tarps:
- Small holes or missing shingles
- Quick emergency protection needed
- Budget constraints exist
- Damage covers less than 100 square feet
When to choose dry-in:
- Large sections of roof are damaged
- Multiple areas need protection
- Extended time before permanent repairs
- Structural damage affects roof deck
Weather conditions also matter. Tarps handle light rain but struggle in heavy storms or high winds. Dry-ins provide better protection during severe weather.
Who to call to put a tarp on your roof and what to expect
Roofing contractors offer the best option for emergency tarping. They have proper equipment, insurance, and experience working safely on roofs.
Restoration companies like SERVPRO and All Dry USA provide 24/7 emergency services. These companies specialize in disaster response and temporary protection.
What to expect during service:
- Initial damage assessment
- Cost estimate before work begins
- Professional installation with proper materials
- Documentation for insurance claims
Most companies arrive within 2-4 hours for true emergencies. They inspect damage first, then explain the best protection method.
Typical costs range from:
- Small tarp jobs: $200-$500
- Medium coverage: $500-$1,200
- Large dry-in work: $1,200-$3,000
Quality companies guarantee their temporary work and often credit tarping costs toward permanent repairs if hired for the full job.
Will a roofing company tarp my roof? How it usually works
Most roofing companies provide emergency tarping services. They prefer customers who plan to hire them for permanent repairs, but many will tarp any damaged roof.
The typical process works this way:
- Emergency call - Company dispatches crew quickly
- Damage assessment - Contractor evaluates scope of damage
- Temporary protection - Team installs tarps or dry-in materials
- Permanent repair quote - Company provides estimate for full repairs
- Insurance coordination - Contractor helps with claims process
Payment arrangements vary:
- Some companies waive tarping fees if hired for permanent work
- Others charge upfront but credit costs toward final bill
- Emergency-only services typically require immediate payment
Companies usually guarantee temporary work for 30-90 days. This gives property owners time to get insurance approval and schedule permanent repairs.
Response times depend on:
- Severity of damage
- Weather conditions
- Company availability
- Geographic location
Established local contractors often respond faster than large national chains.
Choosing roof tarping companies in Indianapolis
Finding the right roof tarping company requires checking credentials and avoiding fly-by-night operators. Local companies with proper insurance and clear processes provide better service than storm chasers who disappear after taking payment.
Live dispatch, insured crews, and itemized scope
Quality roof tarping companies maintain live dispatch systems for emergency calls. These systems connect customers directly with trained operators who can send crews quickly to damaged properties.
Insurance coverage protects both the company and property owners. Licensed contractors carry general liability insurance and workers' compensation. This coverage handles any accidents or additional damage during tarp installation.
Key insurance requirements:
- General liability coverage
- Workers' compensation
- Bonding for larger projects
Professional companies provide detailed written estimates before starting work. These itemized scopes list materials, labor costs, and timeline expectations. Written documentation prevents surprise charges and establishes clear project boundaries.
Crews should arrive with proper safety equipment and quality materials. Blue poly tarps work for temporary coverage, but heavy-duty vinyl tarps last longer in harsh weather conditions.
How to avoid storm chasers and pick a reputable local roofer
Storm chasers target neighborhoods after severe weather events. These operators knock on doors offering quick fixes but often disappear without completing work or honoring warranties.
Warning signs of storm chasers:
- Door-to-door solicitation immediately after storms
- Pressure tactics demanding immediate decisions
- No local business address or phone number
- Requests for full payment upfront
- Out-of-state license plates on work vehicles
Local roof tarping companies have established reputations in the community. They maintain physical offices and long-term relationships with suppliers. These businesses depend on referrals and repeat customers.
Check company credentials through the Better Business Bureau and state licensing boards. Read online reviews from multiple sources. Ask neighbors for recommendations from companies they have used successfully.
Legitimate contractors provide references from recent customers. They explain their process clearly and answer questions without pressure. Local companies also understand Indianapolis building codes and permit requirements.
Want same-day peace of mind? Michaelis can tarp today and provide a written repair plan
Emergency roof tarping requires immediate response to prevent water damage. Companies offering same-day service help minimize interior damage from ongoing leaks.
Professional crews assess damage severity before installing tarps. They identify structural concerns and document existing damage with photos. This documentation helps with insurance claims and repair planning.
Quality roof tarping companies provide written repair estimates along with emergency services. These plans outline necessary repairs and timeline expectations. Having a complete assessment helps property owners make informed decisions about permanent repairs.
Same-day service benefits:
- Immediate leak protection
- Damage assessment documentation
- Written repair planning
- Insurance claim support
Look for companies that guarantee their tarp installations. Professional installations should withstand normal weather conditions until permanent repairs begin. Companies confident in their work offer warranties on emergency services.
Conclusion
Roof tarping provides homeowners with a vital emergency solution when storm damage strikes. This temporary protection creates a barrier against water, debris, and further structural damage.
Quick action saves money. The faster tarps are installed, the less damage occurs inside the home. Water can ruin floors, walls, and belongings within hours.
Professional installation offers the best results. Trained technicians know how to secure tarps properly and work safely at height. They have the right equipment and materials for each situation.
Tarps are not permanent fixes. Most last 30 to 90 days depending on weather conditions. Homeowners should schedule roof repairs as soon as possible after tarping.
Safety remains the top priority. Walking on damaged roofs is dangerous. Professional services have insurance and safety training that most homeowners lack.
Emergency tarping services cost varies based on roof size, damage extent, and local rates. This investment protects against thousands of dollars in additional damage.
Smart homeowners research local tarping companies before emergencies happen. Having contact information ready speeds up response time when storms hit.
Proper documentation helps with insurance claims. Photos of damage before and after tarping support repair estimates and claim processing.
Call a licensed roof tarping company in Indianapolis today to secure your home and prevent further storm-related damage.

.avif)